
Caching strategies for REST API in Java using Spring Boot

I am a software developer who loves learning and building new technologies and projects from the scratch !
Introduction
You all might have seen my previous post on caching strategies in NodeJs applcations: Various caching strategies For REST API in NodeJs. If not, please do have a look at it.
So we have seen how to define caching in Javascript code earlier, but today we will see how to add a caching layer in java using Spring Boot Application for server-side implementation.
Why do we need cache
The primary goal of caching is to save your server from the pressure of doing the same work again and again. Lets say for an example, you have a page which displays stocks or news-feed. Now, lets imagine that the page will be loaded or refreshed multiple times, but if the same data is being fetched from the database every single time, then there will be a huge load in both the database as well as the server.
You need to look out for a better way and that's where caching techniques comes into picture. So lets quickly start with a basic CRUD example using an H2 instance.
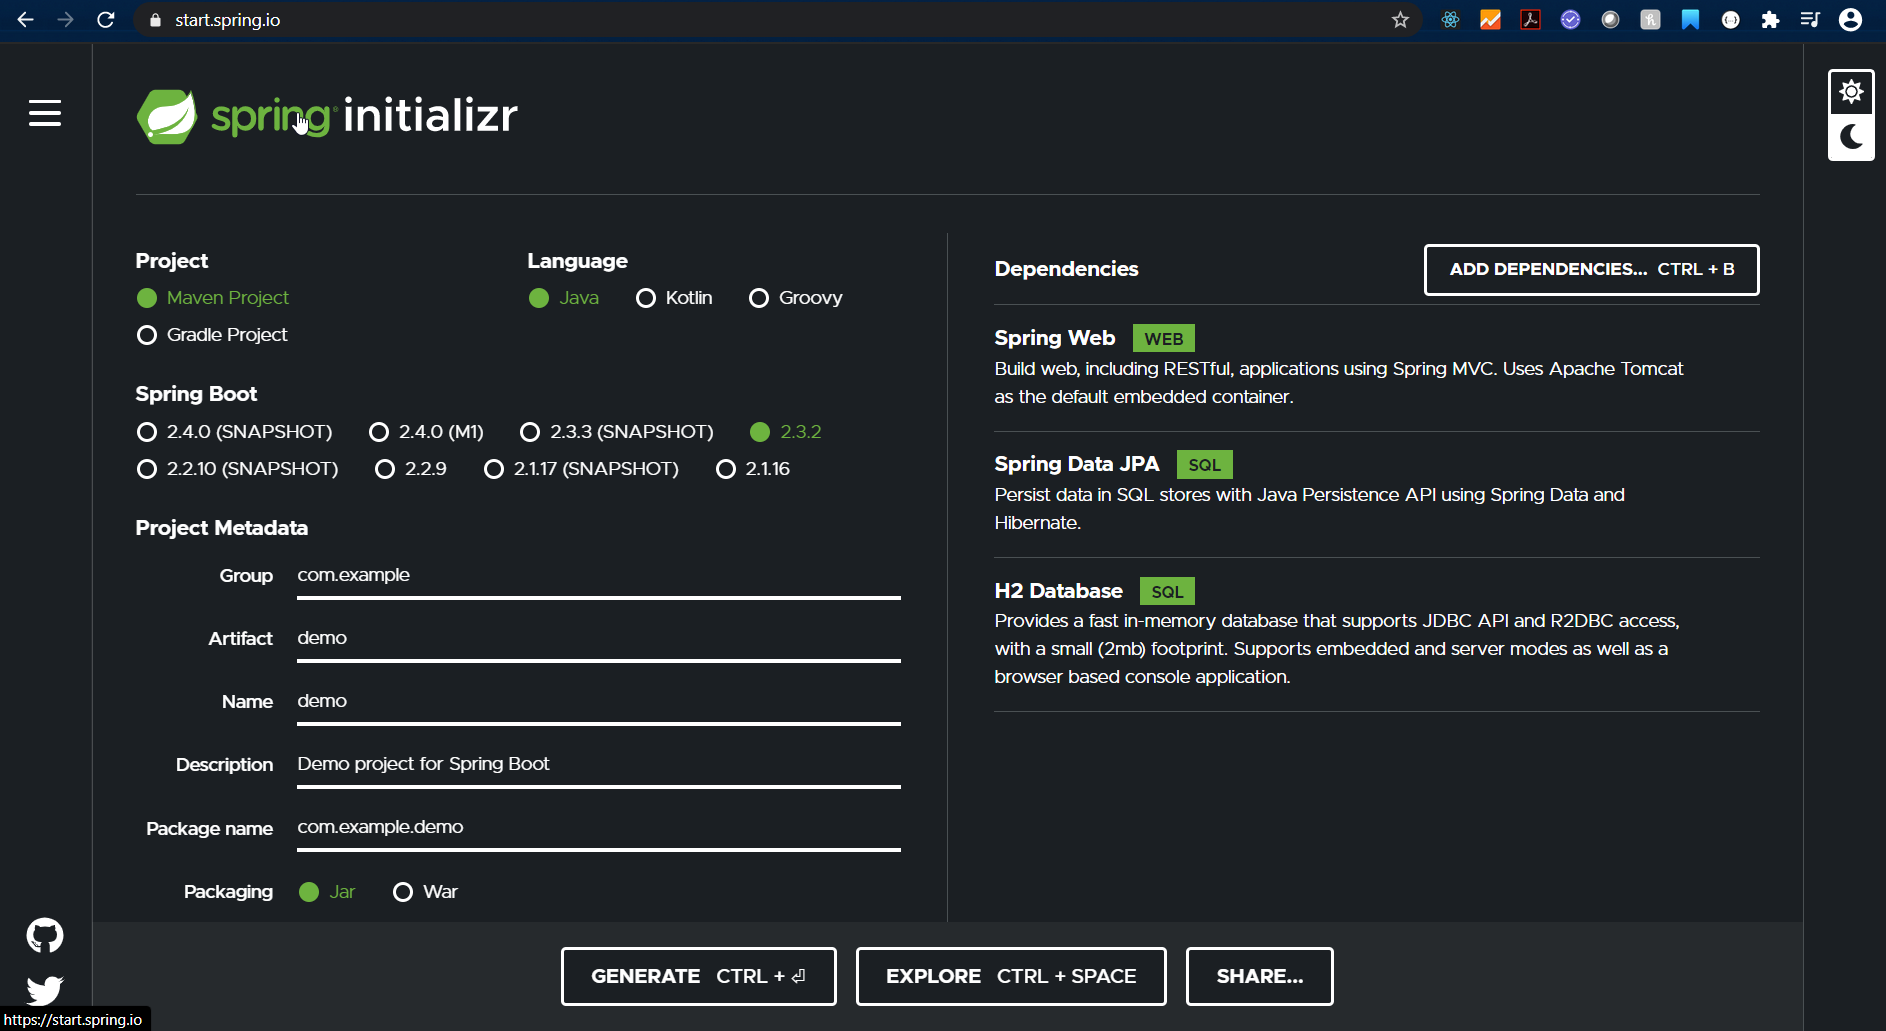
Basic Spring Boot CRUD example
So let's add some basic dependencies:
Now we will create a basic Model: Users.java
@Entity
public class Users implements Serializable {

    /**
     *
     */
    private static final long serialVersionUID = 1L;
    @Id
    @GeneratedValue
    private Long id;
    private String name;
    private String teamName;
    private Long salary;

    public Users() {}

    public Users(String name, String teamName, Long salary) {
        this.name = name;
        this.teamName = teamName;
        this.salary = salary;
    }

    public Long getId() {
        return id;
    }

    public void setId(Long id) {
        this.id = id;
    }

    public String getName() {
        return name;
    }

    public void setName(String name) {
        this.name = name;
    }

    public String getTeamName() {
        return teamName;
    }

    public void setTeamName(String teamName) {
        this.teamName = teamName;
    }

    public Long getSalary() {
        return salary;
    }

    public void setSalary(Long salary) {
        this.salary = salary;
    }

    @Override
    public String toString() {
        return "Users{" +
                "id=" + id +
                ", name='" + name + '\'' +
                ", teamName='" + teamName + '\'' +
                ", salary=" + salary +
                '}';
    }

}
Then a basic JPA repository to connect with the H2 instance.
UserRepository.java
public interface UserRepository extends JpaRepository<Users, Long> {
    Users findByName(String name);
}
Now we will add a basic resource to add our actual logic: UserResource.java
@RestController
@RequestMapping(value = "/rest/search")
public class UsersResource {

    @Autowired
    UserCache userCache;

    @GetMapping(value = "/{name}")
    public Users getUser(@PathVariable final String name) {
        return userCache.getUser(name);
    }
}
So you can see we try to fetch the data from UserCache, where we will add our main logic to fetch the data from database and persist in cache.
Cache using EhCache
Ehcache is an open source, standards-based cache that boosts performance, offloads your database, and simplifies scalability. It's the most widely-used Java-based cache because it's robust, proven, full-featured, and integrates with other popular libraries and frameworks. Ehcache scales from in-process caching, all the way to mixed in-process/out-of-process deployments with terabyte-sized caches.
In order to integrate with our app, lets start with adding the dependency:
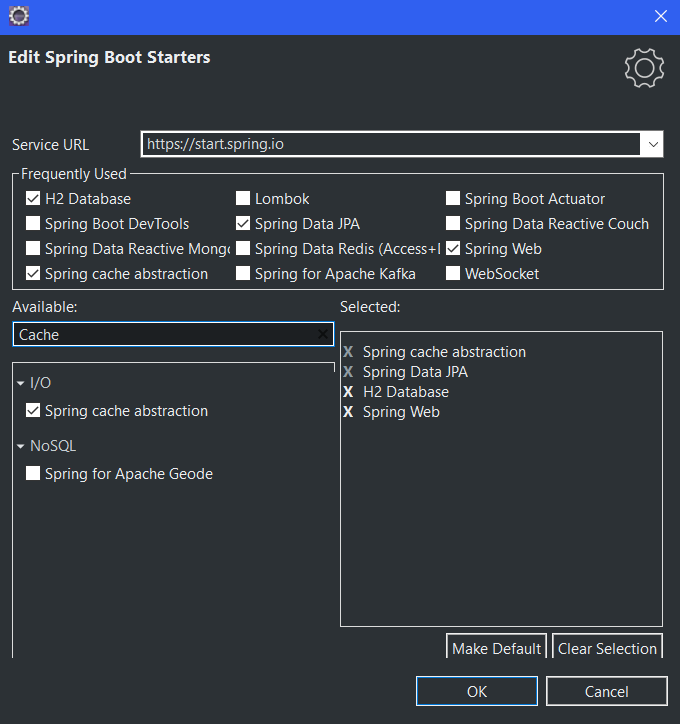
We now need to add a basic configuration to define the EhCacheManager:
EhCacheConfig.java
@EnableJpaRepositories(basePackages = "com.practice.repository")
@EnableCaching
@Configuration
public class EhCacheConfig {

    @Bean
    public CacheManager cacheManager() {
        return new EhCacheCacheManager(cacheManagerFactory().getObject());
    }

    @Bean
    public EhCacheManagerFactoryBean cacheManagerFactory() {
        EhCacheManagerFactoryBean bean = new EhCacheManagerFactoryBean();
        bean.setConfigLocation(new ClassPathResource("ehcache.xml"));
        bean.setShared(true);
        return bean;
    }
}
We will define our caching configuration properties in the form of XML: ehcache.xml
<ehcache xmlns:xsi="http://www.w3.org/2001/XMLSchema-instance"
         xsi:noNamespaceSchemaLocation="ehcache.xsd"
         updateCheck="true"
         monitoring="autodetect"
         dynamicConfig="true">
    <diskStore path="java.io.tmpdir" />

    <cache name="userCache"
           maxEntriesLocalHeap="10000"
           maxEntriesLocalDisk="1000"
           eternal="false"
           diskSpoolBufferSizeMB="20"
           timeToIdleSeconds="300" timeToLiveSeconds="600"
           memoryStoreEvictionPolicy="LFU"
           transactionalMode="off">
        <persistence strategy="localTempSwap" />
    </cache>

</ehcache>
After this, we will bind the actual implementation: UserCache.java
@Component
public class UserCache {

    @Autowired
    UserRepository userRepo;

    @Cacheable(value = "userCache", key = "#name")
    public Users getUser(String name) {
        System.out.println("Retrieveing from database: " + name);
        return userRepo.findByName(name);
    }
}
That's it !! Now you can run your app and hit your REST APIs. You will see the data will be persisted in memory for consecutive calls.
Cache using Redis
Redis is an open source (BSD licensed), in-memory data structure store, used as a database, cache and message broker. It supports data structures such as strings, hashes, lists, sets, sorted sets with range queries, bitmaps, hyperloglogs, geospatial indexes with radius queries and streams. Redis has built-in replication, Lua scripting, LRU eviction, transactions and different levels of on-disk persistence, and provides high availability via Redis Sentinel and automatic partitioning with Redis Cluster.
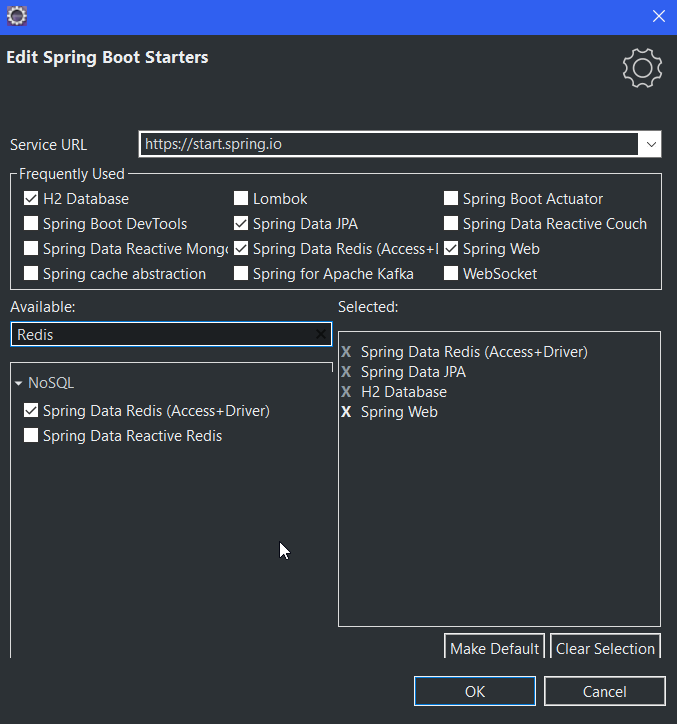
Integration with Redis is much more easier than Ehcache. All you need to do is add dependency:
Then add Redis details in application.properties:
spring.cache.type=redis
spring.redis.host=localhost
spring.redis.port=6379

spring.cache.redis.cache-null-values=false
spring.cache.redis.time-to-live=60000
spring.cache.redis.use-key-prefix=false
Then you can go to main application and enable caching:
@EnableCaching
@SpringBootApplication
public class SpringCacheApplication {

    public static void main(String[] args) {
        SpringApplication.run(SpringCacheApplication.class, args);
    }

}
That's it !! You will be able to persist your data from actual DB into a Redis cluster.
Cache using Hazelcast
Hazelcast In-Memory Data Grid is an open-source distributed In-memory object store supporting a wide variety of data structures such as Map, Set, List, MultiMap, RingBuffer, HyperLogLog. Cloud and Kubernetes friendly.
Integration with Hazelcast is also easier like Redis. All you need to do is add basic dependencies like how we added for ehcahe:
then manually add Hazelcast dependency in pom.xml like below:
<dependency>
    <groupId>com.hazelcast</groupId>
    <artifactId>hazelcast-all</artifactId>
    <version>4.0.2</version>
</dependency>
You now need to add a yaml config in resources: hazelcast.yaml
hazelcast:
  network:
    join:
      multicast:
        enabled: true
Then add @EnableCaching in your main application like how we did for Redis instance.
And that's it !! We are good to go.
Conclusion
So if you take out the average time consumed by each strategy, you will find out that the various caching strategies that we have used is much better than having no caching at all.
Caching comes in handy a lot of times, but you need to be aware of when to use it.
Source Code
Source Code can be found in:


